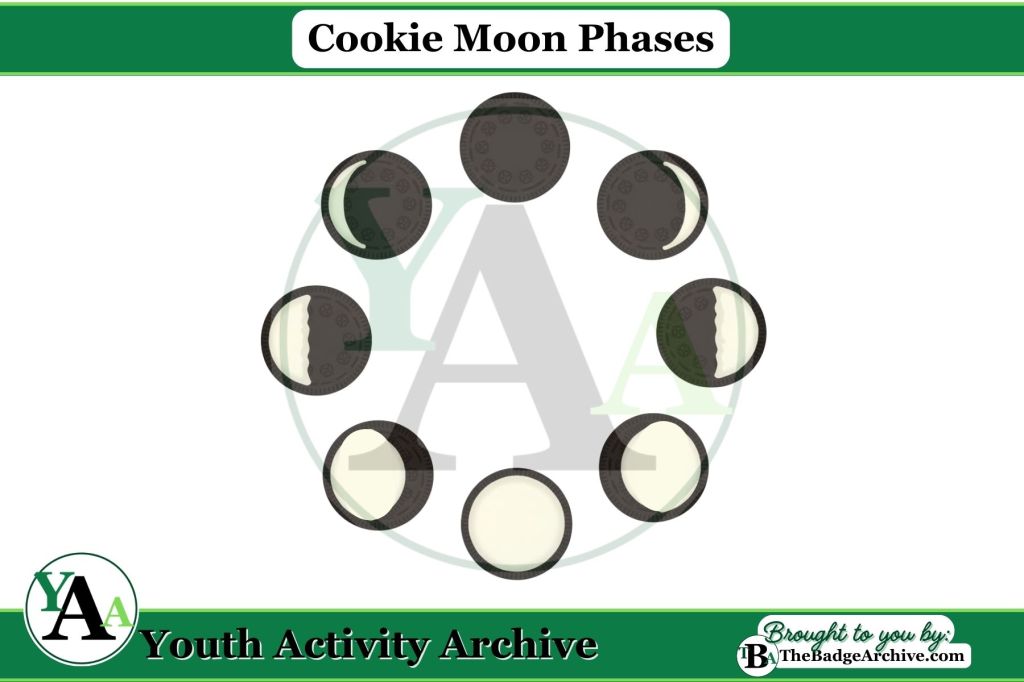
Activity Description: Create the 8 phases of the moon using cookies and frosting to show how the moon changes over time.
Items Needed:
- 8 sandwich cookies with white filling
- Popsicle stick or plastic knife
- Paper plate or black construction paper
- (Optional) Moon phase reference chart
- (Optional) Napkins or wipes
Instructions (Estimated Total Time: 15–20 min):
- Prepare the cookies. (2–3 min)
- Carefully twist each cookie to separate the halves.
- Try to keep the frosting mostly on one side.
- Shape the frosting. (5–6 min)
- Use the stick or knife to scrape frosting into the correct moon phase shapes.
- Create: New Moon, Waxing Crescent, First Quarter, Waxing Gibbous, Full Moon, Waning Gibbous, Last Quarter, Waning Crescent.
- Arrange the phases. (3–4 min)
- Place the cookies in a circle or line to show the moon’s cycle.
- Use a chart or diagram to help with order.
- Talk and taste. (5–7 min)
- Share what each phase is called and why it looks that way.
- (Optional) Eat the extra cookie pieces or enjoy the finished moon phases as a snack.
Step-by-Step Tutorials:
- Alternate Instructions: KC Edventures – Oreo Moon 7 Phases
- Alternate Instructions: Science Bob – Oreo Moon 8 Phases
–
For More Fun Ideas and Plans

Join the Girl Scout Daisy, Brownie, and Junior Leader Help Facebook Group
(Not an official GSUSA Group)

Join the Girl Scout Cadette, Senior, and Ambassador Leader Help Facebook Group
(Not an official GSUSA Group)

See other Recommended Facebook Groups for some Scouting Organizations
(No official Groups)
–
Click Here -> To see information References:
Disclaimer: The information published on Youth Activity Archive and The Badge Archive is built from the references listed below. These sources demonstrate that our content is grounded in facts and research, not opinion or speculation. Readers may consult them directly when looking for additional material.
- Fisher, Jacquie. “7 Moon Activities for Kids: Phases of the Moon.” KC Edventures, 20 Sept. 2018, http://www.kcedventures.com/hands-on-science-phases-of-the-moon-activities-for-kids/. Accessed 28 Jan. 2026.
- “Oreo Cookie Moon Phases.” ScienceBob.com, 22 July 2014, sciencebob.com/oreo-cookie-moon-phases/. Accessed 28 Jan. 2026.
- Find out how you can support The Badge Archive!
Short Link: https://tinyurl.com/2zb6e4jr