Activity Description: Youths fold a single sheet of paper into a 3D triangular stand that can hold a card upright.
Items Needed:
- One sheet of paper (cardstock works best)
- (Optional) Tape to secure the bottom
Instructions (Estimated Total Time: 5–10 min):
Note: If using a template with fold lines like the Finger Puppet Booth Stand, skip step 3 and use the dotted line as a guide to create the thin side flaps in Step 4.
- Fold the paper in half vertically and unfold. (<1 min)
- This creates a tall center crease from top to bottom.
- Fold the paper in half horizontally and leave folded. (<1 min)
- You should now see a rectangle with a folded top edge and open bottom edge.
- Fold each short edge inward to meet the vertical center crease. (<1 min)
- This creates two flaps that open like doors.
- Unfold one side flap, then refold a new thinner side flap using the new crease line as a guide. (<1 min)
- You should have a new side flap that is thinner than the original side flap.
- Repeat on the other side. (<1 min)
- You should now have two thin side flaps.
- Unfold the two thin side flaps. (<1 min)
- You should again see a rectangle with a folded top edge and open bottom edge but new crease lines.
- Using the two thin side flap folds as a guide, fold the top corners of each thin side flap inward at a 45° angle (<1 min)
- The corners should meet the vertical crease to form triangle flaps.
- Unfold the triangle corners and reverse-fold the thin side flaps into house shapes (1 min)
- Gently open each flap and push the triangle folds inward to form a square base with a triangle roof.
- Flip the paper over and fold each house shape in half vertically, tucking it behind. (<1 min)
- You now have a flat rectangle with thin flaps on both the front and the back sides.
- With the folded edge at the top, fold the bottom edge of one side upward to meet the triangle base. (<1 min)
- This creates an upward flap on one side.
- Flip and repeat on the other side. (<1 min)
- This creates a second upward flap, one on the front and one on the back.
- Fold the new upward flap back down in half to meet the bottom edge of the upward flap. (<1 min)
- One upward flap should now be thinner by half.
- Flip and repeat on the other side. (<1 min)
- Both upward flaps should be thinner by half.
- Open the thin upward flaps. (<1 min)
- You now have the original upward flaps with a new fold line.
- Collapse the paper into a 3D triangular tube, using the two fold lines as the two base corner points. (<1 min)
- The two halves of the original upward flaps become the bottom of the triangular tube.
- Tuck one of the halves that form the bottom into the pocket on the other side to lock the shape (1 min)
- (Optional) Use tape to secure the bottom instead of locking them into the fold.
- Place a card into the top crevasse of the triangular tube. (<1 min)
- The top of the triangle has a thin opening where a card can stand upright without assistance.
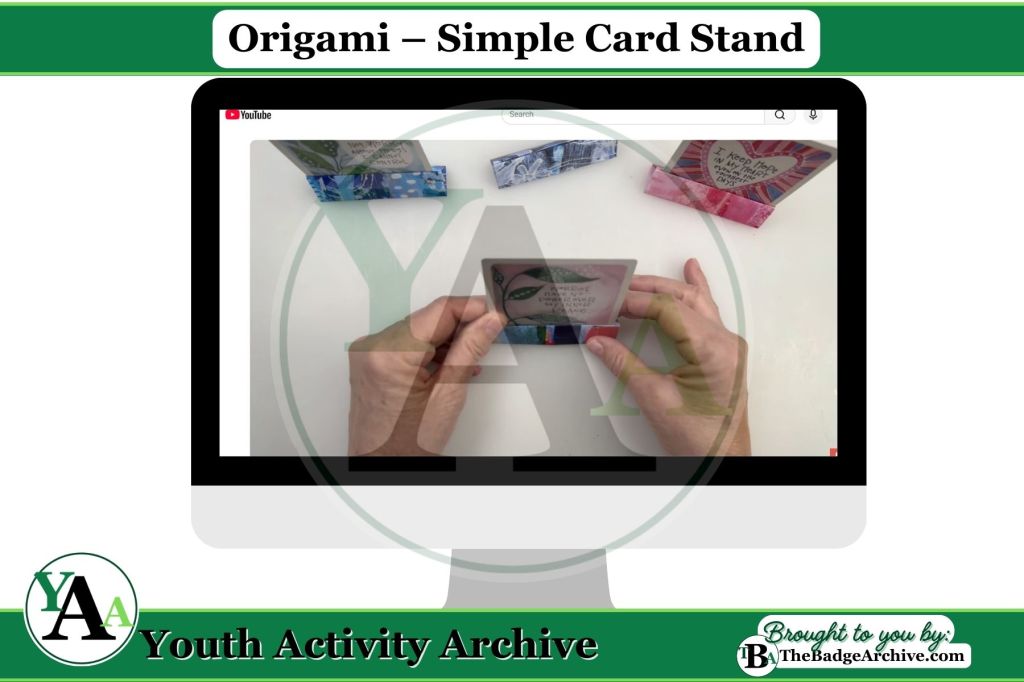
Step-by-Step Tutorials:
Video: DIY Paper Card Stand – Simple 1-Minute Craft
–
For More Fun Ideas and Plans

Join the Girl Scout Daisy, Brownie, and Junior Leader Help Facebook Group
(Not an official GSUSA Group)

Join the Girl Scout Cadette, Senior, and Ambassador Leader Help Facebook Group
(Not an official GSUSA Group)

See other Recommended Facebook Groups for some Scouting Organizations
(No official Groups)
–
Click Here -> To see information References:
Disclaimer: The information published on Youth Activity Archive and The Badge Archive is built from the references listed below. These sources demonstrate that our content is grounded in facts and research, not opinion or speculation. Readers may consult them directly when looking for additional material.
- “DIY Paper Card Stand – Simple 1-Minute Craft.” Create with Karen Elaine, 7 Nov. 2024, youtu.be/E2zguhl2ZeQ?si=QNp-mLQ6HdQ79Yac. Accessed 20 Nov. 2025.
- Find out how you can support The Badge Archive!
- Return to the Crafting Category
- See other Origami